
I spent time looking around for a similar type (vintage) model but with aileron control. Well I think I have found the answer - The Dane RC Leprechaun (version 2) glider.

The maiden flight of my Leprechaun glider January 2020
The kit has arrived.....


Beautifully packaged

Might need a bigger bench
So the build begins (1st October 2019)
Online at the Dane RC website there is a very comprehensive build guide which I will be following as much as possible.
My first impressions of the kit is the quality of the wood and the accuracy of the laser cut parts, so lets hope this continues.
My first job was to cut out a small part of the plan that details the wing spar assembly. The wing spar is cut from a very strong piece of hard wood (glad I purchased the Proxxon KS230). The other elements are already cut to shape and even the small bolts are supplied.


Part 1 of my Video Build Vlog


Now the wing joiner and wing roots have been partly completed it is time to start the very long fuselage.

Here is where I have built something different to the way detailed on the Dane-Rc website. Its as long as its short so to speak but it will produce the same outcome in the end. They suggest you cut and pin the 10mm x 10mm vertical balsa in place first then glue the long balsa strips to them as I am doing it the other way round. I would rather glue the vertical balsa into the gap between the top and bottom balsa and glue in as a good fit.

I have deliberately left out the diagonals (below) to allow the wing assembly fitting and then the diagonals can be fitted.


Part 2 of my Video Build Vlog


The wing assembly fits beautiful onto the single side that's built.

Starting on the other fuselage side now. As Tim reminded me yesterday, make sure you do have a right and left handed sides. Don't create two identical sides!
 |
| The metre rule gives you some idea of scale |

The nose section pieces have been glued together

Using my belt sander It was relatively easy to get the rough outline of the finished nose

The two tail plane mounts fit nicely onto each side

The two sides have been built and the nose and tail have been trimmed to match the drawing. Now its time to fit the wing joiner assembly. This fitted perfectly due to the precise laser cut parts.

The front formers H & I have been glued into place

Time to glue on the roughly sanded nose section (with the ballast hole to the bottom)

It took me a while to add all the 10mm horizontal and vertical supports in place as well as the 5mm diagonal pieces that each had to be cut by hand to match the corners.


She is coming along well and I am very happy with the progress that has been made.

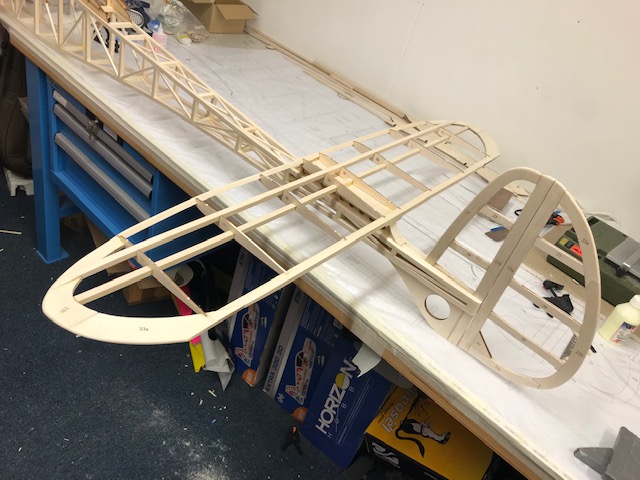
Just for scale purposes. The fuselage is very long!
Time to build the rudder and fin section.


A reasonable fit. Some pieces have had to be repositioned to fit correctly.
Fin dry fitted into position


To get the fin central It will need some balsa wedges located between the fin and the fuselage.

The top of the fuselage has been filled in with balsa. Nice finish!

The underside of the fuselage with the skid having been blocked in with balsa sheet

Rudder now hinged to the fin

Fuselage coming along well.


Plywood servo box dry fitted only
The next of my video build vlog - Part 4
I purchased the wing / fuselage servo connectors from ebay.

Just need to learn how to solder!
Time to start the tail plane......


Started by gluing the corner sections (32a / 33b) of the tail plane. I also glued the two no.34's together. Cut out the ribs (30,31,32).


Piece 33a needs to be flush with part 34

Rib 31 seems to be not cut correctly. When its square on and in line at the front the rear of the rib sits proud. The whole rib is to big and needs gentle sanding to match the one either side.


The underside of part 34 needs tapering down to 33a

Tapered down toward the tip


2mm balsa skin to the under side. Leaving the top surface skin till later.

Roughly sanded all around. The leading edge has come out nice

The tail plane is huge!

The tail plane is reasonably square on its balsa seat.

Added in the diagonal braces. Now to decide what servo is needed for the elevator and where it needs positioning. I have seen servo's located vertical with the servo head being on the top surface of the tail plane. The drawing seems to hide the servo in the tail plane with the servo push rod going out the rear of the tail plane seat. Time to speak with Tim.


Struggling with the elevator as I need to cut down the trailing edge (curved part) to match the small ribs. These don't line up with the sides of this part.

Thought long and hard about the need for elastic bands to hold on the tail plane. Decided to replace the bands with a nylon bolt towards the front and a dowel locating stud to the rear.

To gain access to the wing bolt for tightening I made a small hole the size of the nylon bolt head. This hole can be used to replace the bolt if required.

Using Poly C (water based resin) and fine glass cloth,, I covered the tail plane seat to add some additional strength mainly against ground handling damage like getting the model in and out of the car.

The finished tail plane seat glass clothed.


Standard servo fitted and 2500mah Eneloop RX battery dropped in but not fitted.


Video build vlog - Part 5 - Tail Plane
Video build vlog - Part 6 - Fuselage
 Start by positioning your 12mm x 10mm clearance spacers as per the plan.

 Join 16a, 16b, 16c and 12 together flat on the board. I wasn't sure if this was a good idea as you will only need to cut on this joint later to create the aileron but Michael from Dane-Rc said this was the way to do in, so here we go. I have already created the wedge shaped piece that will be glued on the top surface of the tip to sit under the top section of spar as it sails over the tip (see below).
Time to start on the wings - Right wing first


Cut and pin the first spar (two sections have been joined to give the length required). Then carefully glue in the ribs 1 & 2 (previously joined) then 3 - 11. I created a little jig up from balsa bits to make sure ribs 1 & 2 where exactly where I wanted them on the plan.


Wing Ribs glued with the various stretchers also glued in.

The aileron section cut out.

Here is the aileron without its leading edge. Remember to glue in plywood Rib 8 with the horn and not the balsa 8a rib without the horn, if you want to install the servo as per the Dane-Rc website.
You will see that there is a rectangular cut out in Rib 8 at the leading edge. This is for the servo. I have purchased Savox SH0255MG servo's and this will fit nicely into the cut out with just a little filing to get the hole a tiny bit bigger.

You will see that there is a rectangular cut out in Rib 8 at the leading edge. This is for the servo. I have purchased Savox SH0255MG servo's and this will fit nicely into the cut out with just a little filing to get the hole a tiny bit bigger.


Also Rib 11 is not notched correctly on the underside front stringer. I had to make the slot about 1-2mm bigger to take the 6mmx 6mm balsa stringer right at the tip.

Video build vlog - Part 7 - Right Wing (part built)


Aileron shaped to match the main wing section.


Time to box in the back edge of the top and bottom 10mm x 12mm spar with 1.5mm balsa sheet.
Time to re-visit the tail plane.

Just a little video of the tail plane bolted into the fuselage and the elevator servo connected via a long (2000mm) extension lead to the front servo bay.

I'm wont be around for a week or so. Here is a collection of the built bits so far...…

Back to the build and started on the second half of the wing. Decided not to follow the first wing construction. Learning from the difficulties that where thrown up on wing 1 made building wing 2 a lot easier.


Well here she is for the first time with both (not finished) wings fitted. It is a big model!


Time to go back to the fuselage and box in the centre wing section area.


I gave up with the 9 pin wing connecting plugs (as per the drawing) and went for a simpler servo cable running back under the wing joiner and it comes out under the hatch where you secure the wings.


I used these little self adhesive plastic wire clips. These are used in cars for electrical wires. Easy and secure.

Got the ailerons hinged and the pushrods put on and secured and now time for the leading edge top skin to be glued on. One problem - Not enough pegs!!

Didn't turn out that bad.

Now the other wing


Decided it must be far easier just using masking tape to hold down the leading edge rather than using a load more pegs. Less damage and marking on the sheeting.


Here are the wings with the top sheeting fitted
One of the problems I have encountered is the gap between the top and bottom of the main spar and the top and bottom of the wing ribs. See picture below.


Here is the sanded down wing section. I had to sand a little of the wing ribs in some area's just to make the wing flush.

I initially made the rudder 'Push - Pull' and ran the push/pull cables all through the fuselage to the front servo. I fear that given the length of cable that over time these will stretch and become inefficient so I changed my mind and scraped that idea and decided to fit a servo in the tail for direct drive to the rudder.

Front hatch completed using 3mm ply. Using a spring load catch to secure the hatch. I decided to fit the battery switch within this hatch as it lends itself perfectly for quick stitch on / off.


Here you can see the battery fitted in the nose and the Spektrum AR620 6 channel RX.
Moved onto the wing retaining system that I have tried to make as simple as possible. Went to B & Q and got some eye hooks and screwed then into the ply rib (though hole provided). I have glued some additional plywood behind the rib to give some added strength.

Held together using a small zip tie. Single use solution. Just snip it apart after each use.

These wings should not be going anywhere!
Time to start covering the beast!
I thought this time I would cut out the fuselage sides and top/bottom from the plan and then I can use these as patterns to cut around on top of the Profilm / Oracoat.


Now the wings!

First goes on the transparent yellow up to the sheeted leading edge

Then the top sheeted leading edge covered with fluorescent yellow

The finished top surface

Then to get some contrast the underside sheeted area covered in purple.


Well here she is - finally finished and ready for the slope
The wing joiner appears to be made of hardwood which has been cut and joined in the middle. That's unusual, where wings are removable the joiner is normally a solid piece of steel or carbon fibre.
ReplyDeleteYes the wing joiner is made of hardwood which when glued and bolted together isn't going anywhere. Seems more than adequate to me.
DeleteWhich glue do you use?
ReplyDeleteI have been using JP Alphalic Resin. Very yellow when dries which is a little annoying but grips and dries very well. THe first time I have used this so lets wait and see how things go. Not used any Cyno so far.
DeleteIs that a laminated balsa nose block?
ReplyDeleteNo, it’s a laminated plywood nose.
ReplyDeleteI like the look of that long-reach clamp you used for holding the nose block on. What are they called and where can I get those from?
ReplyDeleteI'm sure these where an eBay purchase. Could tell you what they are called, sorry!
ReplyDeleteJust got mine, including motor and prop as we don't have oceanside cliffs in Florida. This plane is a beautiful work of art. Will be using the videos and photos to get me through the build. The quality of the kit is excellent.
ReplyDeleteBigOldJim, Spring Hill, Florida
Hi, great build dairy which has been very helpful. Can you tell me did you have any problems with the wings or tail plane warping after covering? If so how did you correct it?
ReplyDelete