The model is sold as either a standard glider or as a powered glider
Here is my completed Wisel (above) - Dec 2019
Here is a video of the Wisel Light S Glider
December 2019 - Start of the build
The kit arrived 3 or 4 days after being sent from Dane-RC in Denmark. In a strong but compact box that was nicely packed in side. So lets get started!
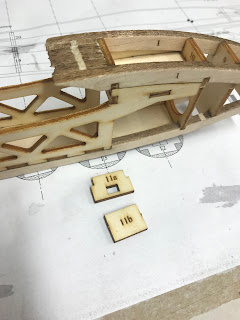
I've started by carefully cutting away the many components from there balsa and ply sheets. This was a relatively easy process as they have been very well laser cut and it usually takes a little cut to release them. The smaller parts I have put in a small cardboard box (not to lose them) but the other parts you can see here on the bench.
PLEASE NOTE: DUMB ALERT!
DO NOT BREAK OF THE BALSA TABS ON THE WING RIBS LIKE I DID!
THESE ARE NEEDED TO BUILD THE WING AT THE CORRECT ANGLE.
I SNAPPED OFF ALL THE BALSA TABS - DOHHH!!!!!
If you get to this point check out my notes below before you glue these parts together

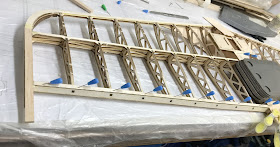
Now my trailing edge is not straight and true. On both sides and at either end of the trailing edge where it meets the tip and the centre section it is not straight. It is bent in quite substantially. On the tip the trailing edge goes into the hole located in the last rib. So I have no control over that one and at the centre section the trailing edge (I assumed which could be wrong) glues to the triangular former which houses the wing retaining nut. This has also bent the trailing edge in.

Had lots of issues getting the leading edge to locate properly into the front of the wing ribs. I didn't locate the ply leading edge as far back as they should have been. I just didn't want to break any ribs but make sure your leading edge goes in far enough that when you lay the balsa top and bottom (leading edge) that is fits nicely. I had 3 or 4 mm of ply exposed which meant I had to glue in additional balsa to take the gap up. I copied the steps as detailed on the Dane-Rc website and glued the two parts of the leading edge together first but in hindsight having them as two halves at this point may have been easier. Just a thought!

I did find that being very clumsy and heavy handed that I broke off (accidentally this time) some of the balsa tabs underneath the wing.
This was another pain in the butt. What should have been a simple job turned out to be a lot more difficult for me than it should have been. Trying to get the balsa sheet to sit nicely on top of the ribs was not easy for me. I used white glue when in fact for ease and to get an immediate seat onto the ribs I should have used Cyano glue from underneath.
Now here is another story of sheer stupidity on my part. My usual bull at a china shop type of story. There I was racing along with bits of ply and balsa in one hand and Cyano glue in the other with no brain cells engaged. STOP and THINK have you got a left and a right Elevon ????
I very stupidly made two left sides - what a numpty!!!
Anyway now (as above) I do have a left and a right Elevon
You should have 4 long balsa strips. These glue top and bottom on the tips. Make sure you have enough balsa overhanging the tips to roughly the depth of the elevon. 


Looking good Paul. I cant wait to get my kit and get building!
ReplyDelete